
I still remember the first time I stared down the Wall of Flesh. My heart was pounding, my bridge was barely built, and I had no idea what I was doing. In 2026, this fight remains the ultimate gatekeeper between the relatively chill pre-Hardmode and the chaotic nightmare of Hardmode. But don't worry—once you understand the mechanics and prepare correctly, you can turn this colossal wall of meat into a pile of loot. Let me walk you through everything I've learned over countless runs.

How to Summon the Wall of Flesh 🕯️
You'll summon this boss in the Underworld, and there are two methods. The classic way is to kill a Voodoo Demon, which drops a Guide Voodoo Doll. Toss that doll into any lava pool down there and the Wall emerges. The alternative is to somehow get your Guide NPC to touch lava in the Underworld (which usually involves some creative house-moving). The doll method is far more reliable, even if farming Voodoo Demons can be a pain. 💀 One critical detail: the Guide must be alive for either method, so don't accidentally let him die to a random zombie before your attempt. The Wall always spawns on the side of the world opposite to you and starts crawling toward the map's edge; if it reaches the end, you all die instantly.
Knowing Your Enemy: Attacks & Behavior 👹
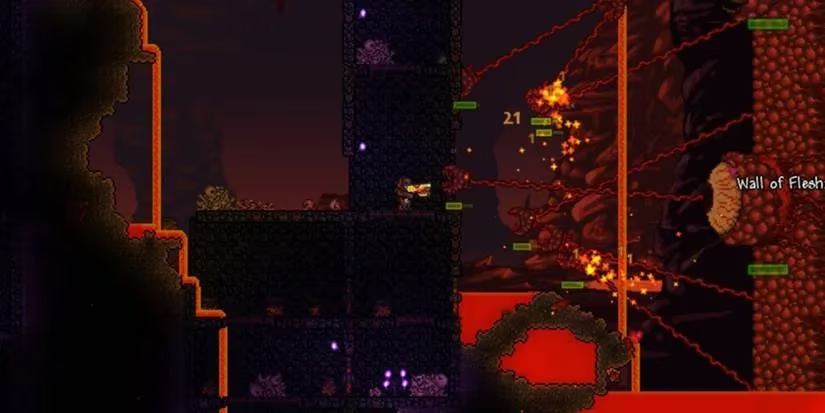
The Wall of Flesh has three appendages that make the fight chaotic:
-
The Hungry: These smaller mouths are attached by veins and lunge at you to deal contact damage. As the Wall's health drops, they get stronger and more aggressive. You can detach them with enough damage, turning them into flying pests, but killing a detached Hungry drops a heart.
-
Eyes: They stay on the main body and fire lasers. The lower the Wall's health, the faster and harder they shoot.
-
Leeches: Annoying worm-like things that launch off the Wall and fly toward you. They also drop hearts when slain, so they're actually a handy source of health if you can handle them.
Speed is your real enemy here. The Wall accelerates at 75%, 50%, 25%, and 10% health. In Expert and Master Mode, it gets even faster; it can max out at 41 mph, which outruns even the Bunny Mount. If you ever fall behind, a giant tongue will yank you into its mouth for an almost guaranteed death. ⚡ Staying ahead is non-negotiable.
Pre-Battle Preparations: Build the Perfect Arena 🏗️
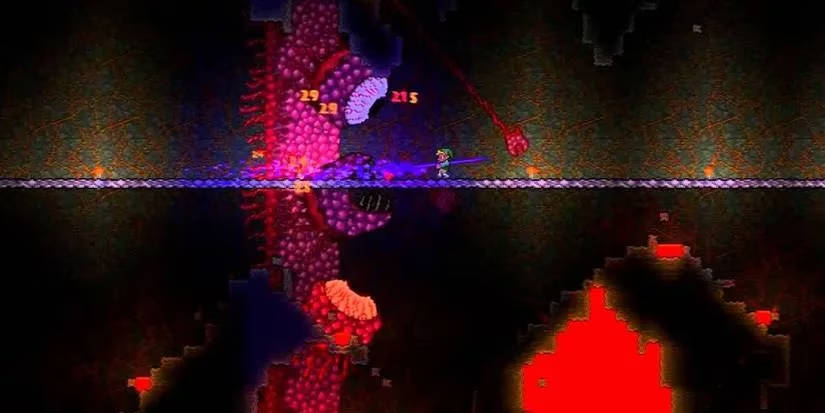
Before you even think about summoning the Wall, spend some time terraforming. I dig out a massive, flat bridge stretching across most of the Underworld. Use obsidian platforms or solid blocks (stone/ash) so you can run uninterrupted. Clear any obstacles above and below, and make sure to scoop out lava pools with a bucket or obsidian skin buff. Then, scatter these life-savers along your running path:
| Buff Station | Effect |
|---|---|
| Campfires & Torches | Light and passive health regen |
| Heart Lanterns | Increased health regeneration |
| Stars in Bottles | Mana regeneration (essential for mages) |
| Bast Statues | Defense boost |
| Garden Gnomes | Luck-based damage reduction & damage increase |
| Sunflowers | Movement speed boost |
| Honey Pools | Dip for health regeneration |
I also place a few carefully positioned sharpening stations, ammo boxes, crystal balls, and bewitching tables right before the summon to grant buffs like Sharpened, Ammo Box, Clairvoyance, and an extra minion slot.

Potions & Food: The Secret Sauce 🍲
Potions can make or break this fight. I always use at least:
-
Heartreach Potion – grabs those lifesaving hearts from afar.
-
Inferno Potion – sets the Hungry and Leeches on fire when they touch you, dealing passive damage.
-
Titan/Thorns Potion – knocks back Hungry and damages them.
-
Obsidian Skin or Water Walking Potion – to ignore lava hazards.
-
Swiftness & Ironskin Potions – more speed, more defense.
-
Calm Potion – reduces enemy spawns during the fight.
Don't forget food! A Slice of Cake gives Sugar Rush (speed and mining boost), but any well-fed buff helps. The Pumpkin Pie is easy to mass-produce if you've set up a pumpkin farm.
Best Class Setups: Armor, Weapons & Accessories ⚔️
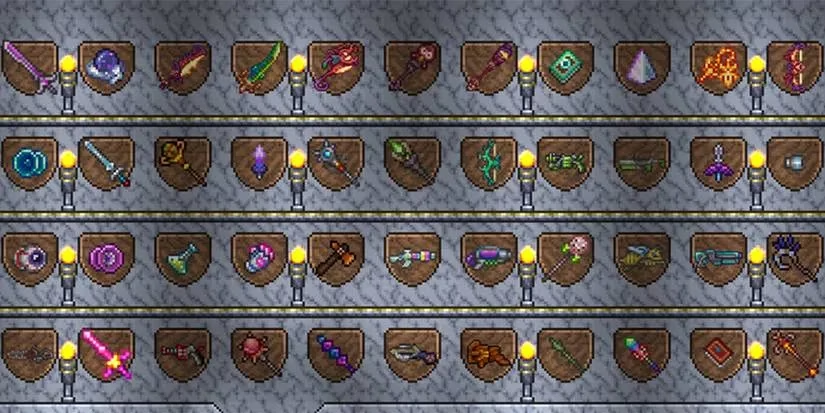
You've got options, and I've tried them all. Here's what works best for each playstyle:
🛡️ Melee
-
Armor: Molten Armor (highest defense and melee damage).
-
Weapons: Falcon Blade (autoswing, lets you run while attacking), Night’s Edge (better on Desktop), Bee Keeper (summons bees), or Sunfury (flail that hits multiple parts).
-
Accessory Must: Obsidian Shield to resist knockback.
🏹 Ranged
-
Armor: Necro Armor (crit chance, ammo conservation).
-
Bows: Hellwing Bow (rapid fire, best with wooden arrows), The Bee’s Knees (bee arrows), Molten Fury (fire debuff).
-
Guns: Phoenix Blaster with Meteor Shot, or the absurdly powerful Star Cannon (if you've farmed Fallen Stars).
-
Accessory Tip: Shark Tooth Necklace buffs damage considerably.
🔮 Magic
-
Armor: Jungle Armor or Meteor Armor (Wizard set okay, but less defense).
-
Weapons: Demon Scythe is my personal favorite—it pierces and hits multiple times. Book of Skulls, Space Gun (Meteor Armor synergy!), or Gray Zapinator for chaotic massive hits.
-
Accessory: Celestial Cuffs for mana sustain.
🐝 Summoner
-
Armor: Bee Armor for an extra minion slot, or Obsidian Armor for whip speed.
-
Weapons: Imp Staff (fireballs!), Ballista Rod (piercing), or Explosive Trap Rod (area denial).
-
Whip: Snapthorn or Firecracker to tag the Wall.
💣 Throwing/Explosives
- Beenades are hands-down the easiest way to demolish the Wall. Farm the Queen Bee, gather hundreds of them, and watch the bees melt everything. Molotov Cocktails and Grenades are also fantastic.

Battle Strategy: Keep Moving, Prioritize Wisely 🏃
Once the Wall spawns, the golden rule is: never stop running. Keep a healthy distance—about a screen length or so—so the tongue doesn't grab you. My priority list:
-
Clear Hungry – they block shots and hurt. Detach or kill them first.
-
Snap at Eyes – they become more dangerous as the fight drags on.
-
Ignore Leeches unless they swarm you; they drop hearts, so leave some alive for emergency healing.
-
Dump damage into the main body whenever there's a clear shot.
I like to weave in vertical movement using a Cloud in a Bottle or Rocket Boots to avoid lasers and lunges. If you're using piercing weapons like the Demon Scythe or Starfury, aim through multiple parts to maximize damage. And don't panic when the Wall speeds up—just keep running and let your bridge do its job.
Final Check Before the Throw ✅
Before I toss that doll, I make sure:
-
Guide is alive.
-
My bridge is clear and lit.
-
All buff stations are active.
-
Potions and food are consumed.
-
I have a Magic Mirror or Recall Potion just in case (though escaping once the fight starts is tough).
This fight is your rite of passage. Nail it, and Hardmode opens up with all its glory—new biomes, tougher bosses, and the journey toward the Moon Lord. Good luck, Terrarian! You've got this. 🌟